使用UGUI的Image可以轻松实现进度条的效果。但是有些情况下我们需要制作针对游戏世界中的物体的进度条,例如人物头顶的HP条,机器旁边的CD条等。常规的做法通过将世界坐标映射到UI,然后使用Image制作这些元素。当游戏世界中的物体
位置改变的时候,需要通知UI去改变相应元素的位置,如果需要考虑摄像机对于进度条的影响,例如摄像机拉远时进度条变小,则会更加麻烦。
这里提供一种使用shader实现进度条的方案。测试环境:Unity 2020.3.32。
这里使用SpriteRender作为渲染器,其默认使用的shader为Sprite/Default。我们从官网下载内置shader集合,从中找到
Sprites-Default.shader,暂且将其代码作为我们的新shader代码。
可以看到里面有一句代码#pragma fragment SpriteFrag表示shader的fragment函数是SpriteFrag,从UnitySprites.cginc中找到这个方法并改写成我们自己的方法。这里,为了看一下sprite默认的uv信息我们做一下
简单修改。
1
2
3
4
5
6
7
|
fixed4 TestSpriteFrag(v2f IN) : SV_Target
{
    fixed4 c = SampleSpriteTexture(IN.texcoord) * IN.color;
    c.rgb = fixed3(IN.texcoord.x, IN.texcoord.y, 0);
    c.rgb *= c.a;
    return c;
}
|
当然记得改成我们自己的fragment函数#pragma fragment TestSpriteFrag。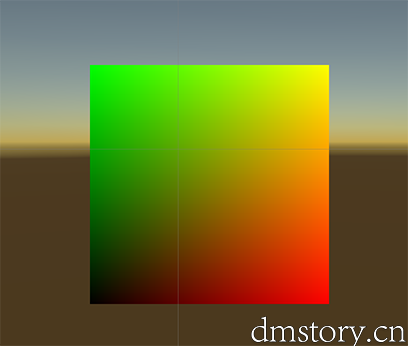
可以看到默认uv是左下角为[0, 0]右上角为[1, 1]。
定义一个变量用于控制fillamount:
1
2
3
4
5
6
|
FillAmount("FillAmount", Range(0, 1)) = 0
...
...
...
fixed _FillAmount;
...
|
使用脚本控制fillamount:
 1
 2
 3
 4
 5
 6
 7
 8
 9
10
11
12
13
14
15
16
17
18
19
20
21
22
23
24
25
26
27
|
public class FillAmountCtrl : MonoBehaviour
{
    private SpriteRenderer _sr;
    private MaterialPropertyBlock _block;
    private int _fillAmountId;
    private float _fillAmount;
    // Start is called before the first frame update
    void Start()
    {
        _sr = GetComponent<SpriteRenderer>();
        _block = new MaterialPropertyBlock();
        _fillAmountId = Shader.PropertyToID("_FillAmount");
    }

    // Update is called once per frame
    void Update()
    {
        int dir = 0;
        if (Input.GetKeyDown(KeyCode.RightArrow))
            dir = 1;
        else if (Input.GetKeyDown(KeyCode.LeftArrow))
            dir = -1;
        _fillAmount = Mathf.Clamp01(_fillAmount + dir * 0.1f);
        _block.SetFloat(_fillAmountId, _fillAmount);
        _sr.SetPropertyBlock(_block);
    }
}
|
让我们将关注点再拉回到shader的fragment部分,要使用shader模拟进度条效果,我们需要根据传入的_FillAmount参数,为每一个片元计算其是否应该显示,我们用一个变量f表示。
对于单纯的横向和纵向还是比较简单的:
1
2
3
4
5
6
7
8
|
fixed4 FillAmountHorL2R(v2f IN) : SV_Target
{
    fixed4 c = SampleSpriteTexture(IN.texcoord) * IN.color;
    float f = step(IN.texcoord.x, _FillAmount);
    c.a *= f;
    c.rgb *= c.a;
    return c;
}
|
1
2
3
4
5
6
7
8
|
fixed4 FillAmountVerB2T(v2f IN) : SV_Target
{
    fixed4 c = SampleSpriteTexture(IN.texcoord) * IN.color;
    float f = step(IN.texcoord.y, _FillAmount);
    c.a *= f;
    c.rgb *= c.a;
    return c;
}
|
圆周的情况复杂一些:
 1
 2
 3
 4
 5
 6
 7
 8
 9
10
11
12
13
14
15
16
17
18
|
fixed4 FillAmountRadius(v2f IN) : SV_Target
{
    fixed4 c = SampleSpriteTexture(IN.texcoord) * IN.color;
    //映射到以[0.5,0.5]为中心
    fixed2 uvCenter = fixed2(IN.texcoord.x - 0.5, IN.texcoord.y - 0.5);
    //计算与y轴点积
    float d = dot(fixed2(0, 1), normalize(uvCenter));
    //计算与y轴夹角
    float radius = acos(d);
    //考虑超过PI的情况
    float radius2 = 3.14159265358979 * 2 - radius;
    radius = step(uvCenter.x, 0) * radius2 + step(0, uvCenter.x) * radius;

    float f = step(radius / 3.14159265358979 / 2, _FillAmount);
    c.a *= f;
    c.rgb *= c.a;
    return c;
}
|
BGM
